Alternative Methods:
Windows Hello
Windows Hello is an easy way to use a passkey for multi-factor authentication. You can authenticate on a Windows computer using a PIN, fingerprint, or facial recognition.
Note! Windows Hello is device-specific. The passkey will only work on the computer on which it was set up. If you switch to a different computer, you will need to set up the Windows Hello passkey again on the new device.
If you are unable to set up a Windows Hello passkey, you can use an alternative method such as KeePass or Bitwarden.
1. On your Windows computer, search for “Sign-in options” and open the settings.
2. Select “Windows Hello PIN”. You can also choose Fingerprint or Face if supported by your device.
3. Set up your preferred Windows Hello sign-in method by following the on-screen instructions.
4. Go to the IDM page:
Enter https://idm.utu.fi in your browser’s address bar and press Enter.
5. Select “Multi-Factor Authentication (MFA) Settings.”
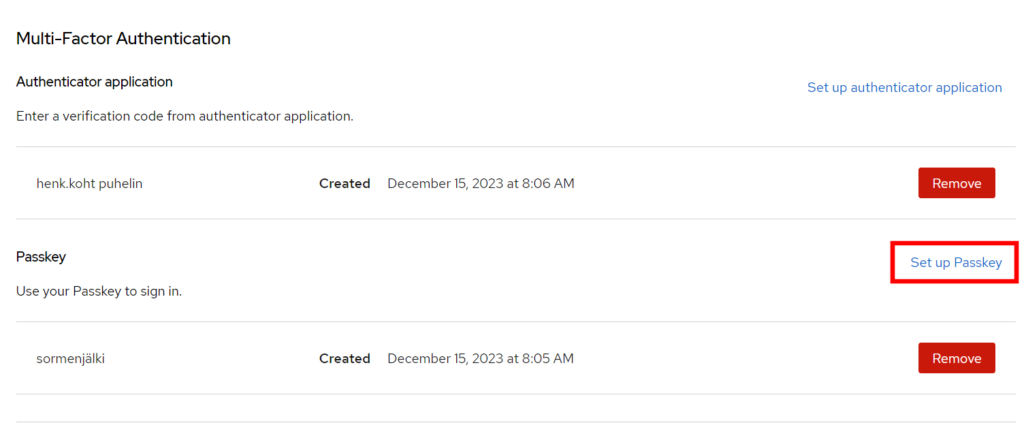
6. Click “Set up Passkey.”
7. Sign in using your account password.
8. Select “Register” and then choose “Windows Hello or external security key.”
9. Follow the on-screen instructions and authenticate using your selected Windows Hello method.
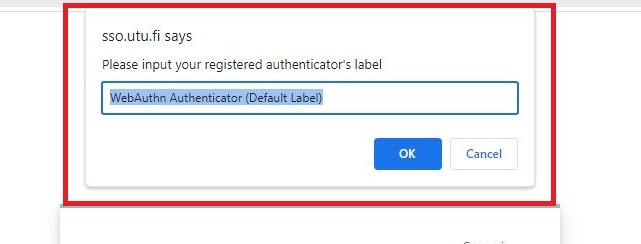
10. Give the passkey a descriptive name, such as “Windows Hello.”
Mac
Security Key
Linux & others
KeePass or Bitwarden can be used for multi-factor authentication, for example on a Linux computer. These are alternative methods when it is not possible to use an authenticator app or a passkey.
We recommend using an authenticator app on your phone as the primary method whenever possible.
Bitwarden
Instructions for setting up Bitwarden:
- Create a Bitwarden account Go to Bitwarden and select “Create Account.” Fill in the following fields:
- Email address
- Name (optional)
- Master Password
- Confirm Master Password
- Password hint (optional)
- Install the Bitwarden browser extension
Download the extension from Bitwarden Downloads. - Sign in to the Bitwarden browser extension.
- Go to the IDM UTU website: Enter https://idm.utu.fi in the browser’s address bar and press Enter.
- Select “Multi-Factor Authentication (MFA) Settings.”
- Select “Signing In / Kirjautuminen.”
- Select “Set up Passkey / Rekisteröi pääsyavain.”
- Select “Register / Rekisteröi.”
From the list that appears, select “Bitwarden.” - Create a passkey in Bitwarden.
- Give the passkey a descriptive name, such as “Bitwarden.”
KeePass
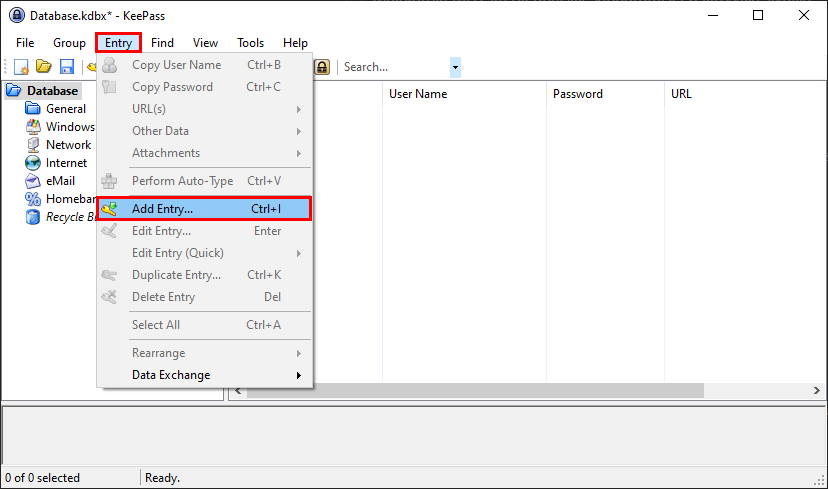
Install Keepass and create a new database according to the Keepass instructions. Once the database is created, you can follow these steps.Add a new entry to the database via the Entry menu:
Fill in your UTU account details in the window so you can find it in the database. You do not need to add a password if you are using the program only as an authenticator. After filling in the upper fields, click “OTP Generator Settings” from the Tools menu.
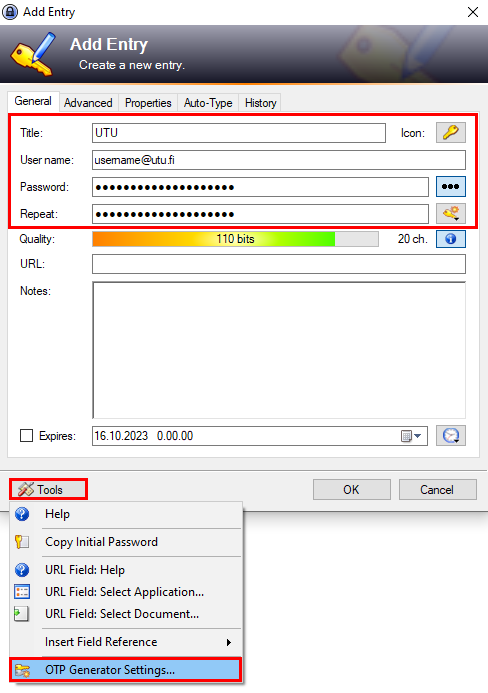
Next, copy the QR code shown on the authentication app registration page into the “Shared secret” field in the window that opens. You can see it by clicking “Unable to scan.” After pasting, remove any spaces from the code. The same window will show a changing code that you can use to complete the app registration. Finish the registration in your browser, then click OK in the window.
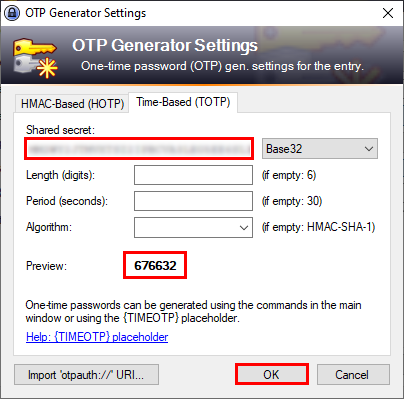
Finally, complete adding the entry to the database by clicking OK in the “Add Entry” window.
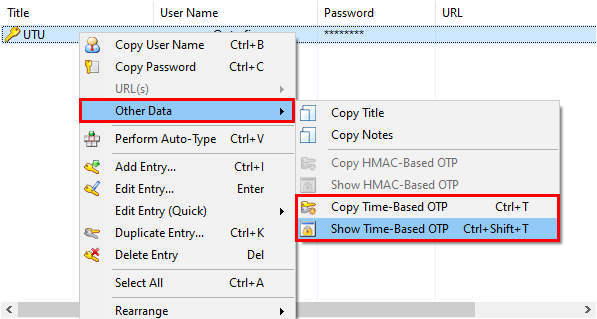
Now, to get the one-time codes used for multi-factor authentication, open the database in Keepass, and enter the database password. Then, right-click your entry in the database and choose to either copy the code to the clipboard or display it on the screen.